Project Explorer
1. Select in Project Explorer
🔥 This feature is currently considered experimental. Try it out and give feedback by reporting bugs and suggesting new features. It’s not recommended for production use.
👥 This feature is available to all users.
Allows to select in the Project Explorer view what is selected in the main editor area (in the visible diagram/table).

2. Expand all
🔥 This feature is currently considered experimental. Try it out and give feedback by reporting bugs and suggesting new features. It’s not recommended for production use.
👥 This feature is available to all users.
|
This operation may take a considerable amount of time for projects with a massive hierarchy and a high number of children. Exercise caution when performing this action in such scenarios. |
Explore the hierarchy of children for any element in the Project Explorer:
-
Open the Element Options Menu of any element with children.
-
Click
Expand all.
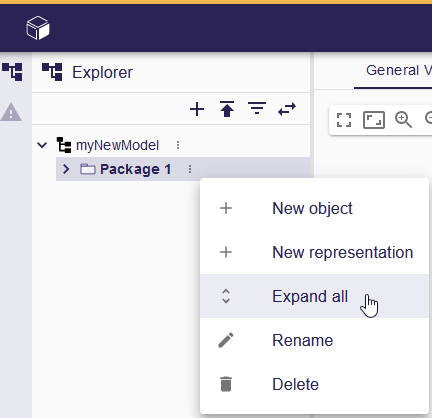
This action expands the selected element and all its children recursively, offering a detailed view of the hierarchical structure.
3. Filter elements in the Project Explorer
🔥 This feature is currently considered experimental. Try it out and give feedback by reporting bugs and suggesting new features. It’s not recommended for production use.
👥 This feature is available to all users.
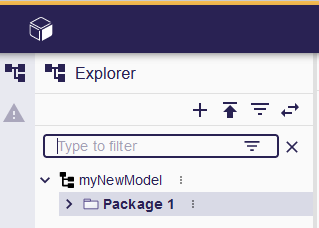
3.1. Filter from name
To filter elements in the Project Explorer using the filter bar:
-
Choose a tree item in the Project Explorer.
-
Press
Ctrl+f(Windows/Linux) orCmd+f(MacOS) to enable the filter bar. -
Enter a value in the filter bar.
-
All visible tree items containing the typed value are highlighted.
-
Use the filter button inside the filter bar to hide all visible tree items that don’t contain the entered value.
This capability allows for precise filtering and highlighting of elements based on specified criteria.
|
The filter bar can only highlight items in the expanded state; it doesn’t search within unexpanded children. Ensure the desired tree items are expanded to effectively use the filter and highlight capability. |
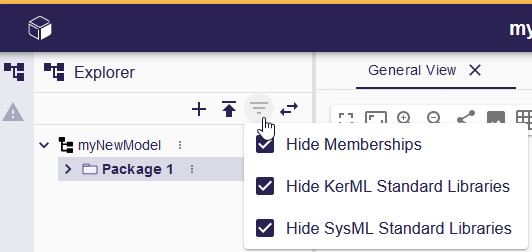
3.2. Filter from kind
Six filters are available in the Project Explorer to filter element by kind:
-
Hide Memberships,
-
Hide KerML Standard Libraries,
-
Hide SysML Standard Libraries.
-
Hide Root Namespaces
-
Hide User Librairies
-
Hide Root Namespaces
These filters allow to clear the Project Explorer view. By hiding the technical elements, only the data directly exploited by the user are displayed, which make the model more readable in the Project Explorer view.
To filter elements in the Project Explorer by their kind using the filter tool:
-
Click filter button,
-
Select filters to activate.
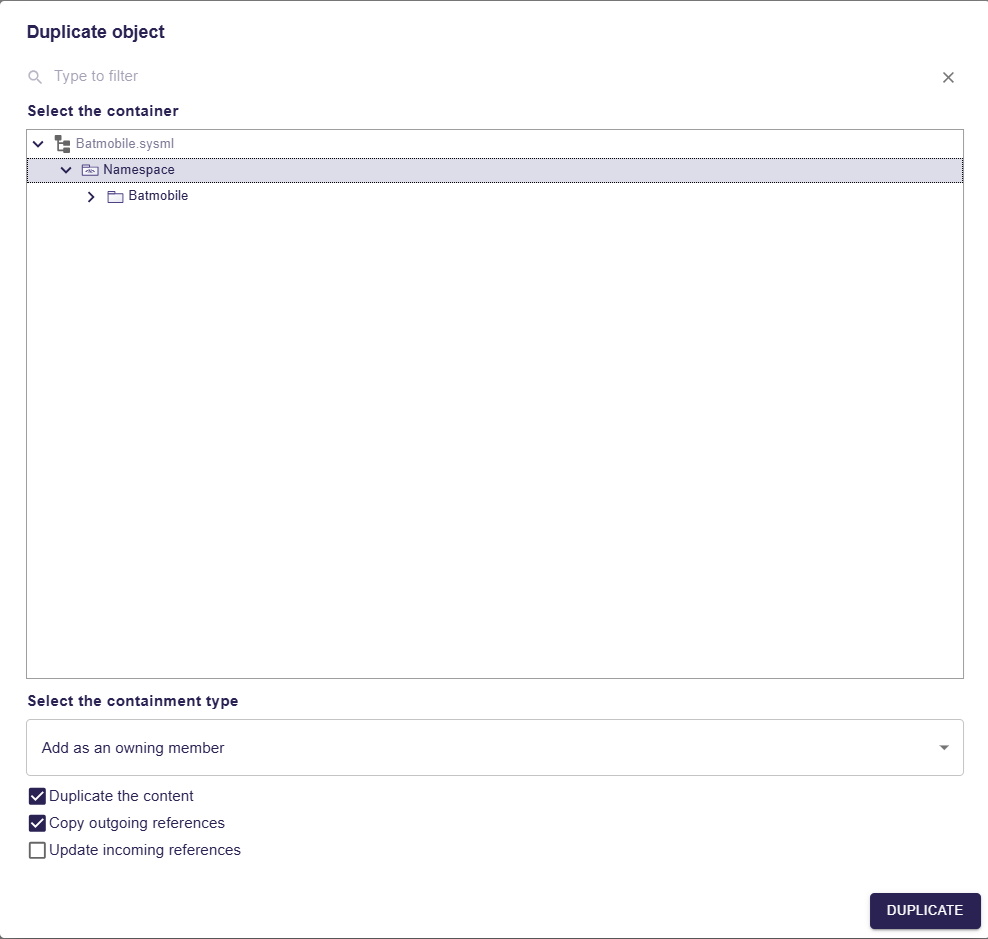
4. Duplicate an Element
To duplicate elements in the Project Explorer, use the contextual menu Duplicate object.
|
This action is only available on SysML |
In the dialog:
-
Choose the target that will own the duplicated element.
-
In the drop-down list, choose the type of
Membershipto use if several kinds are available.
Optionally, the following options can be used:
-
Duplicate the content : When selected, the element and its contained elements are duplicated. Otherwise, only the selected element itself is duplicated.
-
Copy outgoing references : When selected, all outgoing references (e.g. type references, usage links…) are preserved in the duplicated element.
Example:
private ScalarValues::*

part p1 {
  attribute x : Real
}
If x is duplicated without Copy outgoing references, the duplicate will not have its type set to ScalarValues::Real.
|
It is strongly recommended to keep this option enabled to ensure a consistent model. |
-
Update incoming reference : This option is not yet fully implemented in SysON and currently has no effect.